
While it is often best to contact a professional to replace your dryer vent hose, it is absolutely possible for you to handle this project on your own. We totally get it. Over time, lint, dust, and tiny cracks can block airflow and stop your dryer from performing at its best. This leads to longer drying cycles and higher energy bills.
You want it fixed fast and at the lowest cost. With the right tools, this is a manageable DIY task. However, we highly recommend getting our team on board if you are not 100% confident in your ability to perform this operation safely.
Your DIY Prep Checklist
Tools You Will Need
- New dryer vent hose (flexible aluminum or semi-rigid metal)
- Screwdriver or nut driver
- Foil duct tape (skip the regular silver tape!)
- Vent clamps or worm gear clamps
- Vacuum or lint brush
- Scissors or a utility knife
Don’t have this stuff lying around? Sometimes the smart move is calling a dryer repair pro in Charlotte, NC. We show up with the right gear and get it done fast and safe.

7 Steps to a Fresher, Faster Dryer
Step 1: Safety First, Power Off
Always unplug your dryer before you start. Got a gas dryer? Turn off the gas supply too. That way you avoid any chance of a shock or a gas leak while you’re working in tight quarters.
Step 2: Create Some Work Space
Gently pull the dryer away from the wall a foot or two. No yanking. The old hose might still be attached at the wall, and you don’t want to mess up that connection. Whirlpool or Samsung? Check the clearance before you tug.
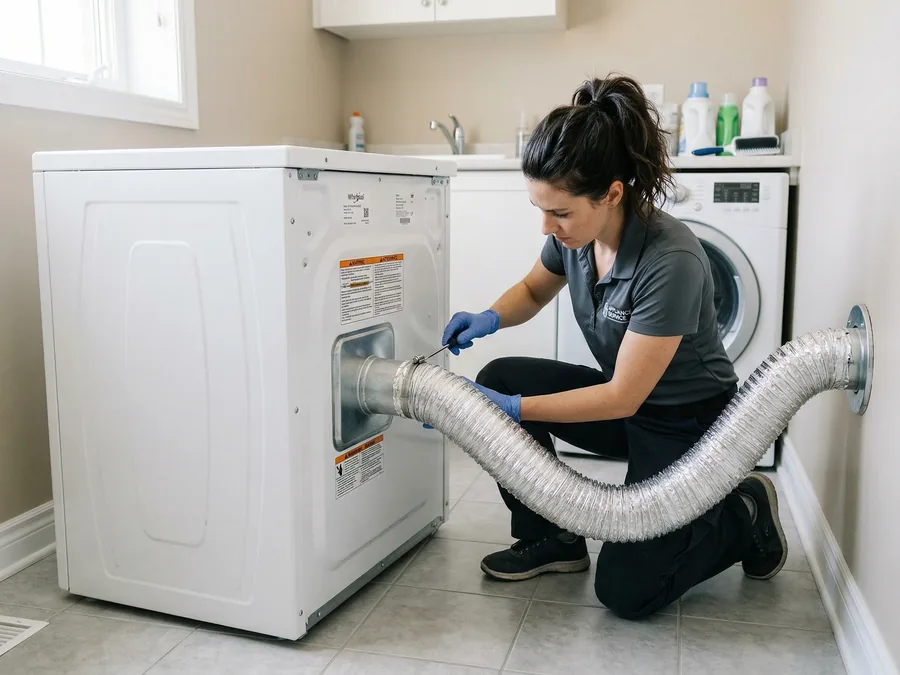
Step 3: Remove the Old, Grimy Hose
Find the metal clamps at the back of the dryer and at the wall. Loosen the screws with your screwdriver, then slide the hose off. While you’re back there, it’s a good time to think about common washer and dryer issues. Hose packed with lint? You might need more frequent dryer maintenance.
Step 4: Deep Clean the Area
Don’t skip this step. Use a vacuum or a vent brush to clear out the duct inside the wall. Getting rid of that hidden lint cuts fire risk and lets your dryer breathe. While you’re in maintenance mode, check out our guide on how to clean your fridge condenser coils and keep your whole kitchen running smooth.
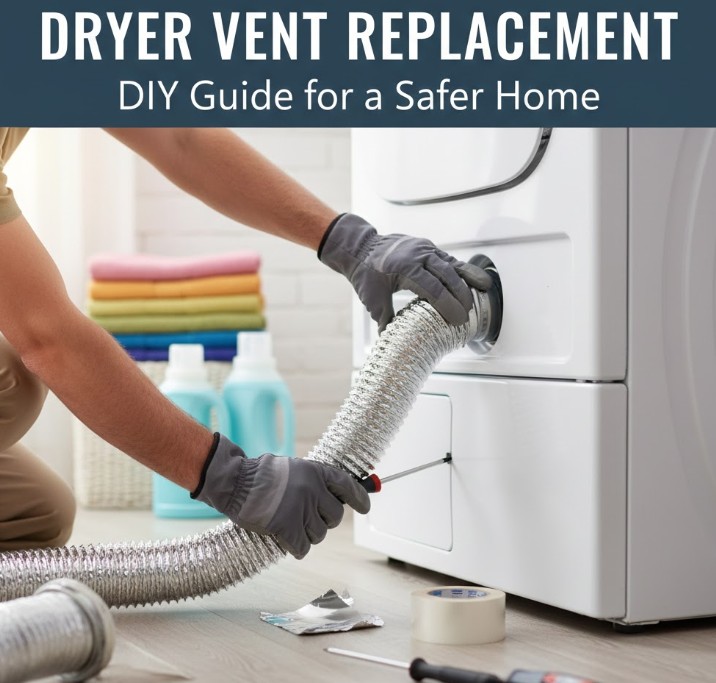
Step 5: Install the New Vent Hose
- Slide the new hose over the dryer exhaust.
- Tighten the clamp until it is snug but do not crush the metal.
- Attach the other end to the wall vent.
- Seal the joints with foil duct tape for a leak-proof finish.
- Avoid plastic hoses because they are major fire hazards.
Step 6: The “No-Kink” Push Back
Carefully slide the dryer back toward the wall. Keep the hose straight and don’t crush it. A kinked hose is as bad as a clogged one. Leave a few inches of space between the machine and the wall.
Step 7: The Final Test Run
Plug the machine in and run a short, warm cycle. Go outside to your exterior vent flap. If you feel a strong breeze, you nailed it! If you live in an apartment and cannot go outside, feel the airflow at the connection point to ensure it is exhausting properly.
When to Skip the DIY and Call Just Call
Sometimes a simple hose swap turns into a bigger deal. Vent running through the ceiling, lots of turns, or a long run through the attic? Time to call a pro. We do expert appliance repair across the Charlotte area, including Matthews, Concord, and Indian Trail.
Give us a shout if:
You smell gas or spot damaged gas lines.
The wall vent is hard to reach or blocked deep inside.
You want to make sure your place is up to North Carolina fire code.
The U.S. Fire Administration reports that clothes dryers cause roughly 2,900 residential fires per year. A damaged vent hose is one of the most common contributing factors. Replacing a worn vent hose is one of the simplest safety upgrades a homeowner can make.
Rigid metal duct is the safest option because it does not compress, will not sag, and has a smooth interior that resists lint buildup. Semi-rigid aluminum flex duct is a good second choice where rigid is not practical. Avoid white plastic accordion hoses entirely, as they are a fire hazard and not up to current building code in most jurisdictions.
Frequently asked questions
How do I know if my dryer vent hose needs replacing?
Signs include a dryer that takes more than one cycle to dry clothes, a burning smell during operation, visible tears or kinks in the hose, or excessive heat buildup behind the machine. If your vent hose is made of white plastic accordion-style material, replace it immediately regardless of its age.
How often should I replace my dryer vent hose?
A rigid metal duct can last the life of the dryer if kept clean. Flexible aluminum duct should be inspected annually and replaced every 3 to 5 years, or sooner if there is any visible damage. If you are unsure of the age or condition of your vent, a dryer inspection can give you a clear answer.
Can a clogged dryer vent cause my dryer to break down faster?
Yes. Restricted airflow forces the dryer to work harder and run hotter, which shortens the lifespan of the heating element, thermal fuse, and motor. Regular vent cleaning and a proper vent hose can add years to your dryer life. Our dryer repair service in Charlotte can inspect and clean your venting system during any service visit.